

Pottery designed for baking combines creativity with functionality, allowing you to craft beautiful and durable pieces that can withstand high temperatures in the oven. Whether you’re a beginner or an experienced potter, making your own baking dishes is a rewarding process that results in unique, handmade items for your kitchen.
This guide on how to make pottery for baking will walk you through the essential steps, tools, and techniques needed to create pottery that’s not only aesthetically pleasing but also practical for everyday use.
What is Pottery?
Pottery is the process of shaping clay into various objects and then firing them in a kiln to harden and create a durable ceramic material. This art form has been around for thousands of years, with evidence of pottery making dating back to prehistoric times.
The earliest forms of pottery were used for utilitarian purposes such as storage vessels or cooking pots, but over time it has evolved into a highly decorative and functional craft.
Needed Materials
Clay
The main material used in pottery, usually purchased in a clay form and prepared for use. Clay can come in a variety of types, colors, and textures depending on the desired outcome of the pottery piece.
Pottery Wheel
A mechanical device used to shape clay into symmetrical forms by spinning it at high speeds while the potter shapes it with their hands.
Kiln
A furnace or oven used for firing pottery at high temperatures to harden and vitrify the clay, creating a durable material that is able to hold liquid without leaking.
Glaze
A liquid mixture made from minerals and pigments that is applied to pottery before firing to create a decorative, glossy finish. Glazes are also functional as they can make pottery waterproof and more resistant to wear. They can be applied by dipping, brushing, or spraying onto the pottery.
Firing
The process of heating pottery in a kiln to a specific temperature and holding it there for a certain amount of time. This allows for the clay to harden and the glaze to melt and bond with the surface of the pottery. Different types of firing techniques can create different effects on the finished piece, such as high-fired stoneware or low-fired earthenware.
9 Step-by-Step Guidelines on How to Make Pottery for Baking
Step 1: Prepare the Clay
Start by selecting a type of clay that is suitable for baking purposes, such as stoneware clay, which can withstand high temperatures. Remove any air bubbles in the clay to prevent cracking during firing; this can be done through a wedging process.
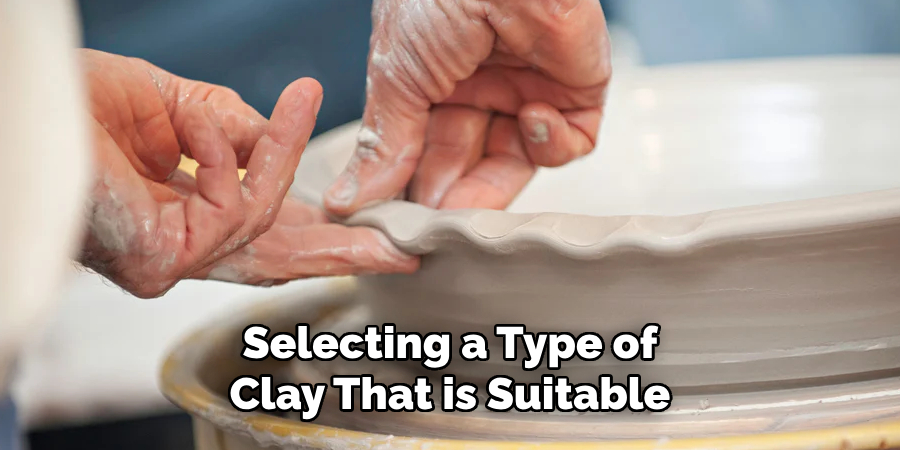
Wedging involves kneading the clay on a flat surface, ensuring it has a consistent texture and is free from impurities. Once the clay is smooth and pliable, it is ready to be shaped into your desired baking ware. Proper preparation is essential for creating durable and functional pottery.
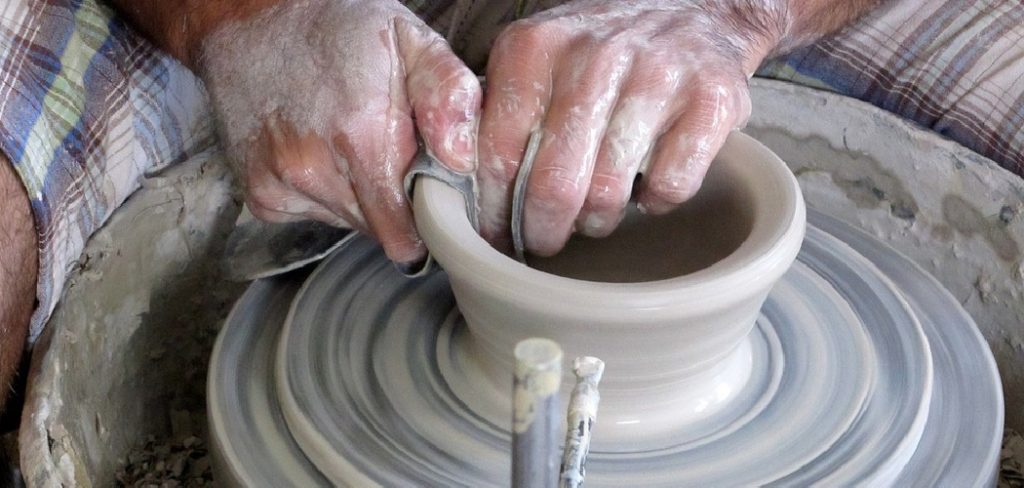
Step 2: Shape the Pottery
Once the clay is properly prepared, the next step is to shape it into your desired baking ware. Begin by deciding on the design you want to create, whether it’s a bowl, dish, or baking tray. Use a pottery wheel for symmetrical pieces or hand-building techniques like coiling or slab-building for more customized shapes.
Carefully mold the clay with your hands or pottery tools to achieve the desired form, making sure the walls are of consistent thickness to prevent uneven firing. Smooth the surface with a damp sponge or flexible rib tool for a polished finish. Take your time during this step, as the shaping process determines the final functionality and aesthetic of your pottery.
Step 3: Decorate (Optional)
Once your pottery piece is shaped and smoothed, you can add decorative elements to enhance its visual appeal. There are several techniques to personalize your work, such as carving intricate patterns into the surface with fine tools, adding textured designs using stamps, or applying slip to create contrasting colors.
You can also experiment with underglaze to paint detailed images or designs directly onto the clay. Remember that the clay should still be damp but firm enough to hold the decorations without distorting its shape. This step allows you to infuse your creativity into the piece, making it uniquely yours.
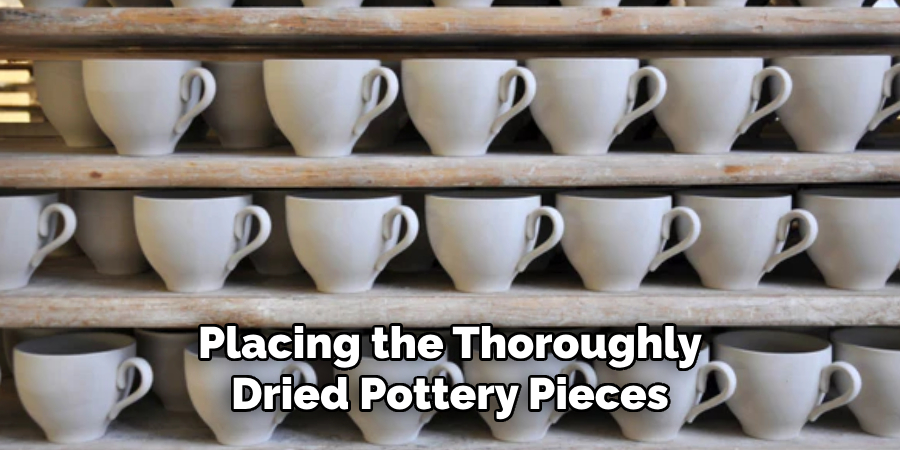
Step 4: Dry the Pottery
Once your decorations are complete, it’s time to allow the pottery to dry thoroughly before firing. Place the piece in a location with good airflow, away from direct sunlight or heat sources, to ensure even drying and prevent cracking.
The drying process can take several days, depending on the thickness of the clay. Patience is key during this stage, as rushing the process may lead to imperfections in the final product. When the pottery feels completely dry and cool to the touch, it is ready to move on to the next step.
Step 5: Bisque Firing
Bisque firing is the first firing process that transforms the dried clay into a more durable, ceramic state. Start by placing the thoroughly dried pottery pieces into the kiln, ensuring they do not touch each other to prevent sticking or warping during firing. Fire the kiln slowly, allowing it to gradually reach the appropriate temperature, typically around 1,800°F (982°C), depending on the type of clay used.
This slow heating prevents rapid changes in temperature that could cause the pottery to crack or explode. Once the kiln reaches the desired temperature, it’s maintained for a specific amount of time, known as “soaking,” to ensure even firing throughout the pieces. Allow the kiln and pottery to cool down completely before unloading. After bisque firing, the pottery will be more resilient and is ready for glazing in the next phase.
Step 6: Glazing (Optional)
Glazing is an optional but highly rewarding step that adds both functionality and visual appeal to your pottery. Start by ensuring the bisque-fired pieces are clean and free of dust, as any debris can affect the glaze’s adhesion. Choose a glaze that suits your artistic vision, whether it is a glossy, matte, or textured finish. Glazes can be applied using various techniques, including brushing, dipping, or spraying, depending on the desired effect.
Be sure to follow the recommended instructions for your glaze, such as thickness and drying time. Once the pieces are glazed, they need to undergo a second firing, referred to as the glaze firing, where temperatures typically range from 1,820°F (993°C) to 2,345°F (1,285°C). This process vitrifies the glaze, creating a smooth, glass-like surface that is both decorative and often waterproof. Always allow the pieces to cool completely before handling or finishing.
Step 7: Final Firing
The final firing process is critical to achieving the desired finish for your pottery. During this stage, ensure the kiln is set to the appropriate temperature based on the type of clay and glaze used. Carefully load the glazed pieces into the kiln, ensuring they do not touch one another, as the molten glaze could cause them to stick together.
Monitor the firing schedule as recommended, which typically includes slow heating, a stable hold at peak temperature, and gradual cooling. Once the kiln has completely cooled, you can safely remove your pieces to reveal their final, vibrant appearance. The result of this meticulous process is durable, beautiful pottery ready for display or use.
Step 8: Cooling
Proper cooling of the kiln is a crucial phase in the pottery process to prevent stress or cracking in the finished pieces. Allow the kiln to cool completely to room temperature before opening it; rushing this step could compromise the integrity of your pottery. Cooling typically takes several hours and should follow the recommended schedule for the type of clay and glaze used.
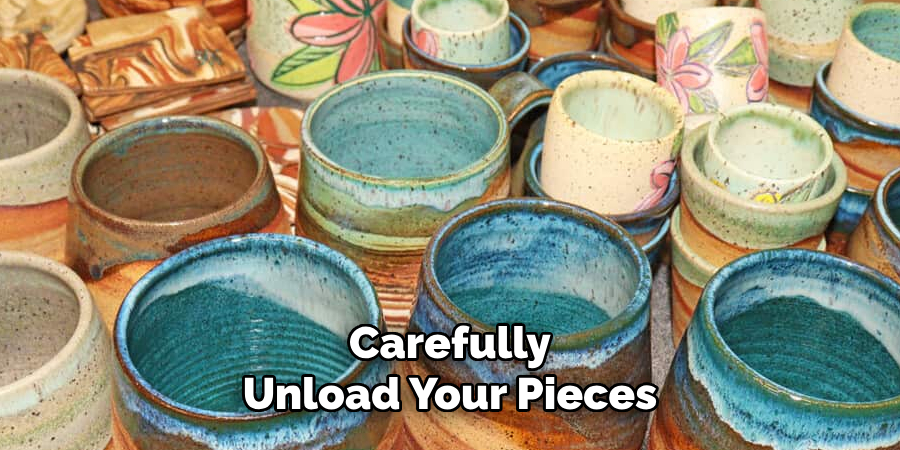
Once the kiln is safely cooled, carefully unload your pieces, checking for any defects or irregularities. This step ensures your pottery retains its strength and beauty, highlighting the care and precision you’ve invested in the entire process.
Step 9: Finishing Touches (Optional)
Once your pottery has cooled, you can add any additional decorative touches such as carving or painting. These finishing touches can enhance the appearance of your pottery and make it truly unique.
Following these steps on how to make pottery for baking will result in a well-crafted piece of pottery that you can proudly display or gift to others. Remember to have fun and be patient with the process, as pottery making is equal parts art and science.
General Tips for Pottery Making
- Start with simple shapes and techniques before moving on to more complex designs.
- Experiment with different types of clay to find one that suits your preferences and needs.
- Keep your tools and workspace clean to avoid contaminating the clay.
- Use a pottery wheel if possible, as it allows for more control and precision in shaping the clay.
- Don’t be afraid to make mistakes. Learning from them is an important part of the process.
- Be mindful of proper posture and body mechanics to avoid strain or injury while working with clay.
- Familiarize yourself with different glazing techniques to add color and texture to your finished piece.
- Join a local pottery class or workshop to learn from experienced potters and gain new insights into the craft.
- Embrace imperfections – they can add character and uniqueness to your pottery.

Conclusion
Pottery is a rewarding and creative endeavor that allows you to express yourself while mastering a timeless craft. By practicing patience, experimenting with techniques, and continuously learning, you can develop your skills and create pieces that are both functional and meaningful. Remember to enjoy the process, as it is just as important as the finished product.
With dedication and an open mind, your pottery journey can become a source of relaxation, personal growth, and artistic fulfillment. Thanks for reading this article on how to make pottery for baking.
Professional Focus
Toby Rede, a professional potter, combines artistic expression with functionality in his ceramic creations. His work blends natural textures, modern forms, and sustainable materials, making him a standout voice in the pottery world focused on intentional craftsmanship.
About the Author
Toby Rede, a dedicated potter and blogger, shares his insights on functional and artistic ceramics, drawing inspiration from sustainable gardening and nature. Based in his studio, he blends craftsmanship with everyday life, encouraging others to incorporate handmade pottery into their homes for both beauty and utility.
Education History
University: Alfred University
Degree: Associate Degree in Ceramic Technology
Toby’s education laid the foundation for his technical expertise, equipping him with the skills necessary to create pottery that merges functionality and aesthetic appeal.
Expertise:
- Pottery Creation
- Ceramic Techniques (Texture, Glazing, Sustainable Materials)
- Functional Art and Design
- Craftsmanship Philosophy
- Blogging on Handmade Pottery and Everyday Life