Ceramic slip is a critical component in the process of creating ceramics, especially in casting and decorative techniques. It is essentially a liquid mixture of clay and water, with a consistency that allows it to be poured into molds.
Slip offers a versatile medium for artisans, enabling intricate designs and form consistency in ceramic pieces. Whether you’re a seasoned potter or a beginner, learning how to make ceramic slip is a foundational skill that opens up a world of creative possibilities in ceramic art.

This guide will walk you through the materials needed and the step-by-step process to produce your own ceramic slip.
Materials Needed
Dry Clay Powder:
The type of clay you use will affect the properties and color of your slip. Kaolin, ball clay, or a blend of both are commonly used for white or light-colored slips. Red earthenware or stoneware clay can be used for colored slip. It is best to use the same type of clay for both your slip and your ceramic pieces to ensure a proper fit during firing.
Water:
The water you use will also impact the consistency and quality of your slip. It’s essential to use clean, potable water to prevent any impurities from affecting the final product.
Mixing Container:
A large bucket or container is needed to mix and store the slip. The size should be based on how much slip you want to make at a time.
Sieve:
A fine-mesh sieve is necessary to remove any impurities or lumps in the dry clay powder before mixing it with water.
Blender or Mixer:
A blender or mixer can be used to mix the slip thoroughly, but it is not necessary. Simply stirring with a whisk or large spoon can also do the job.
Deflocculant:
Deflocculants are chemicals that help keep clay particles suspended in water and prevent them from settling. Sodium silicate or sodium hexametaphosphate are commonly used de-flocculants for ceramic slips.

10 Step-by-step Instructions on How to Make Ceramic Slip
Step 1: Measure
Begin by measuring the dry clay powder. The amount you choose will depend on the volume of slip you wish to produce.
For a typical batch, start with about 10 pounds of dry clay powder. It’s essential to weigh the clay accurately to ensure consistency in your slip. After measuring the clay, set it aside while you prepare the other materials.
Step 2: Prepare Water
Next, measure the appropriate amount of clean, potable water for your clay mixture. Generally, you will need approximately 1 gallon of water for every 10 pounds of dry clay powder. Ensure the water is free from contaminants to maintain the purity of the slip.
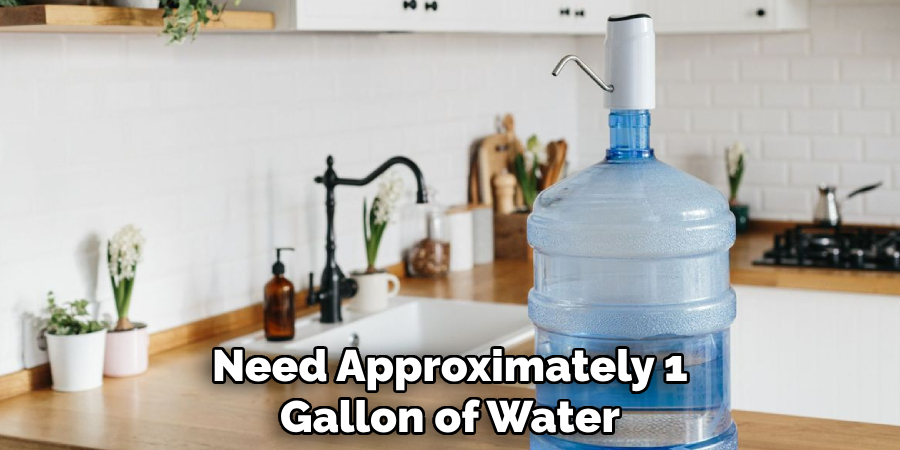
Fill your mixing container with the calculated volume of water. If you plan to use a deflocculant, it is advisable to dissolve it in the water at this stage to ensure it is evenly distributed throughout the slip mixture. Stir the water gently to combine any additives thoroughly before proceeding to the next step.
Step 3: Sieve the Clay
Before mixing the dry clay powder with water, it’s crucial to sieve it to remove any impurities and ensure a smooth, lump-free slip. Place a fine-mesh sieve over a clean container and slowly pour the dry clay powder into the sieve. Use a gloved hand or a spatula to help push the clay through the mesh, breaking up any larger clumps.
This process helps achieve a consistent texture in your slip and prevents any rough particles from ending up in your final ceramic work. Once all the clay has been sieved, discard any remaining debris from the sieve and prepare to combine the clay with water.
Step 4: Add Clay to Water
Slowly pour the dry clay powder into the water while stirring gently with a whisk or large spoon. It’s essential to add the clay gradually and mix thoroughly to prevent lumps from forming. If using a blender or mixer, you can add all the dry clay powder at once and let it run for a few minutes until well mixed.
The consistency of your slip will depend on personal preference and intended use. For example, if you want to use your slip for painting, you may want a slightly thicker consistency compared to what is needed for casting in molds.
Step 5: Check Consistency
After adding all the dry clay powder, it’s time to check the consistency of your slip. The easiest way to do this is by using a hydrometer, which measures the specific gravity or density of liquids. Simply dip the hydrometer into your slip mixture and check for the desired reading based on your intended use.
If you don’t have access to a hydrometer, you can also do a simple “trail test.” Dip a finger or tool into the slip and hold it up vertically. If the slip runs quickly off the edge, it may be too thin. However, if it clings to the tool without dripping off, it may be too thick.
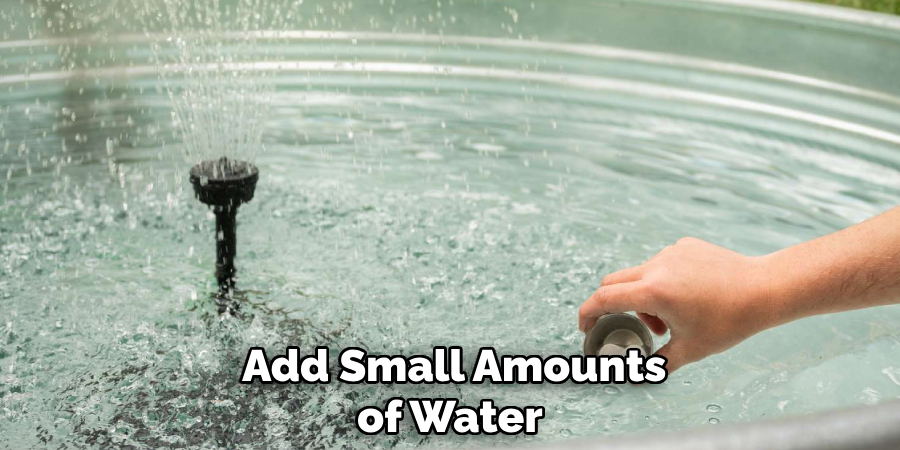
Step 6: Adjust Consistency
Based on your consistency test, you may need to adjust the slip by adding more water or dry clay powder. If your slip is too thin, add small amounts of dry clay powder at a time and mix thoroughly until it reaches the desired consistency. If your slip is too thick, add small amounts of water and mix well until you achieve the desired result.

But be careful not to overmix your slip, as it may affect the quality and properties of the clay particles. It’s always better to err on the side of caution and make small adjustments gradually.
Step 7: Mix Thoroughly
Once you have achieved your desired slip consistency, continue mixing it thoroughly for a few more minutes using a whisk or large spoon. This step helps ensure all the clay particles are evenly distributed in the water and eliminates any air bubbles that may have formed during mixing.
If using a blender or mixer, let it run for an additional minute to ensure thorough mixing.
Step 8: Remove Air Bubbles
After mixing, allow the slip to sit undisturbed for a few minutes. This step helps any air bubbles rise to the surface, making it easier to remove them.
Use a spoon or spatula to gently skim off any visible air bubbles before pouring your slip into a storage container.
Step 9: Store and Age
Once all air bubbles have been removed, transfer the slip into a clean storage container with an airtight lid. Label the container with the date and type of clay used for future reference.
It’s best to let your ceramic slip age for at least 24 hours before using it. During this time, the clay particles will continue to combine with the water and become more homogenous, resulting in a smoother slip.
Step 10: Use or Reconstitute
Your ceramic slip is now ready to use for casting, painting, or any other desired application. If not using the entire batch at once, make sure to re-mix the slip before each use as it may settle over time.
If your slip thickens or dries out during storage, you can add small amounts of water and mix thoroughly until it reaches the desired consistency. However, be cautious not to add too much water as it can affect the properties of your slip.
Now that you know how to make ceramic slip step-by-step, there are a few additional tips to keep in mind for the best results. Firstly, always use high-quality materials when making your slip, including pure clay and clean water.
Furthermore, it’s essential to store your slip in a cool and dry place away from direct sunlight or extreme temperature changes. This will help prevent any bacterial growth and maintain the integrity of your ceramic slip.
Lastly, remember to clean all tools and containers used for making your slip thoroughly after each use to avoid contamination and ensure consistent results in future batches. With these tips and steps in mind, you’ll be able to make high-quality ceramic slip for your artistic and functional projects. Happy creating!
Frequently Asked Questions
Q: Can I Use Store-bought Clay for My Ceramic Slip?
A: Yes, you can use store-bought clay as long as it’s pure and high-quality. However, keep in mind that the type of clay used will affect the properties and characteristics of your slip. The best option is to use the same type of clay for both the slip and your ceramic work.
Q: How Long Can I Store My Ceramic Slip?
A: Your slip can be stored for an extended period as long as it’s kept in an airtight container and maintained at a consistent temperature. However, it’s recommended to use or reconstitute your slip within 6 months for best results.
Q: Can I Use My Ceramic Slip on Leather-hard Clay?
A: Yes, you can use slip-on leather-hard clay to create decorative designs or add texture before firing. However, make sure to score and apply enough pressure when attaching pieces together to ensure a strong bond after firing.
Q: Is There a Recommended Ratio of Water to Clay for Making Ceramic Slip?
A: The ratio of water to clay will depend on personal preference and intended use, but a common guideline is around 1 part dry clay powder to 2-3 parts water. Using a hydrometer or doing a trail test can help determine the best consistency for your slip. It’s always recommended to start with less water and gradually add more if needed.
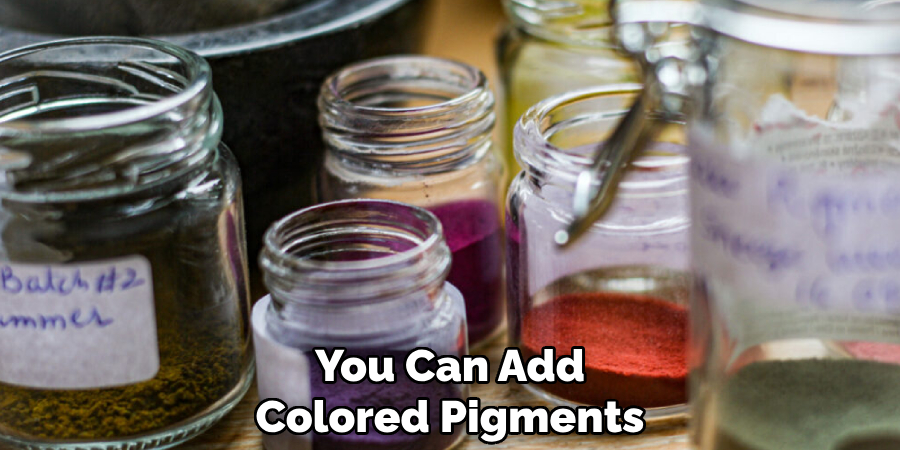
Q: Can I Use Colored Pigments in My Ceramic Slip?
A: Yes, you can add colored pigments or oxides to your slip before mixing for added color and effects. However, make sure they are ceramic-safe and thoroughly mix them into the slip to avoid any clumps or inconsistencies. Overall, have fun experimenting and creating unique slips for your ceramic projects!
Conclusion
Creating ceramic slips is a rewarding and versatile process that allows for creative expression and functional artistry in ceramics. By following the step-by-step guide on how to make ceramic slip provided, you can produce a high-quality ceramic slip tailored to your specific needs. Remember to adjust the consistency carefully, store your slip properly, and use clean, high-quality materials.
With practice and attention to detail, your slip can elevate your ceramic projects, whether you’re casting, painting, or creating intricate decorative designs. Enjoy the endless possibilities and continue exploring new techniques and applications in your ceramic endeavors. Happy crafting!
Professional Focus
Harry Ciotti is a highly skilled kiln operator with a sharp eye for detail and an in-depth understanding of the firing process. His expertise ensures that each ceramic piece reaches its full potential, perfectly balancing strength and beauty. Harry takes pride in overseeing the final stage of pottery creation, transforming raw clay into durable and stunning works of art.
About the Author
Harry Ciotti is a dedicated kiln operator and ceramic artist who brings passion and precision to every piece he fires. With a deep commitment to craftsmanship, Harry ensures that every ceramic creation is fired to perfection, from delicate vases to robust sculptures. He not only operates the kiln, but understands the unique needs of each piece, ensuring it reaches its full artistic potential. Through his work, Harry blends precision with artistry, making every firing a story of transformation.
Education History
University: California College of the Arts
Degree: Master of Fine Arts in Ceramics
Harry’s advanced education in ceramics has refined his technical skills, particularly in kiln operation, firing processes, and ceramic artistry. His educational background equips him to produce top-quality ceramic pieces that reflect both technical excellence and artistic expression.
Expertise:
- Kiln Operation and Firing Techniques
- Ceramics Creation (Functional and Artistic)
- Precision Craftsmanship
- Glazing and Texture Techniques
- Ceramic Artistry and Storytelling