Ceramic Christmas trees have been cherished holiday decorations for generations, evoking a sense of nostalgia and warmth during the festive season. Often adorned with tiny colorful lights, these charming pieces remind many of family traditions and cozy winter nights.
Making your own ceramic Christmas tree is a rewarding experience that allows you to personalize every detail, from the size and shape to the colors and intricate designs. This creative process not only cultivates a deeper connection to the décor but also offers a way to carry on or start a new holiday tradition.

Whether you want to recreate vintage styles or design something uniquely yours, crafting your own brings a sense of accomplishment and joy. This article serves as a comprehensive step-by-step guide on how to make a ceramic Christmas tree, detailing everything you need, from gathering materials to painting and glazing your masterpiece.
Materials and Tools Needed
Creating your own ceramic Christmas tree requires assembling the proper materials and tools to ensure the process is both enjoyable and successful. Below is a breakdown of what you’ll need:
Clay and Molds
The choice of clay is crucial, affecting your tree’s final look and durability. Standard options include earthenware, stoneware, or porcelain. Each type offers unique properties—earthenware is great for beginners due to its workability, while porcelain provides a smooth, refined finish. Decide if you want to use a ceramic tree mold, which simplifies creating a uniform shape, or if you’d prefer to hand-sculpt for a more personalized design.
Essential Tools
Having the right tools on hand is essential. These include clay-cutting tools for shaping, sponges for smoothing, a rolling pin for flattening clay, and sculpting tools for adding fine details. These tools make it easier to manipulate and refine the form of your ceramic tree.
Additional Supplies
You may need slip (liquid clay) to assemble your ceramic tree to join various sections. Once your tree is shaped, you can prepare to decorate it with paints and glazes, adding vibrant colors and finishes. Don’t forget to gather small plastic or glass bulbs—they’ll bring your ceramic Christmas tree to life with festive charm!
How to Make a Ceramic Christmas Tree: Shaping the Ceramic Christmas Tree
Creating the shape of your ceramic Christmas tree can be done in two main ways: using a mold or hand-sculpting. Each method offers different advantages and allows for varying levels of detail and customization.
Using a Mold
If you’re using a mold, prepare it with a release agent. This ensures the cured clay or slip can be easily removed without sticking or distorting the shape. Once the mold is ready, carefully pour liquid slip into it, filling it evenly to achieve a smooth and consistent structure.
Allow the slip to set, which typically takes a few hours depending on the type of clay used and the thickness of the mold. Once the clay is firm, gently separate the mold pieces to avoid cracking or damaging the freshly shaped tree. Handle the structure with care as it will still be fragile at this stage.

Hand-Sculpting Option
You can opt for hand-sculpting your ceramic tree for a more personalized and unique design. Begin by rolling out slabs of clay and stacking them into a basic conical shape. Continue to build layers, tapering the form as you go to mimic the natural silhouette of a tree. Once the general shape is complete, carving and sculpting tools add texture and detail, such as rough bark or layered ‘branches.’
Carving Holes for Lights
Whether you use a mold or hand-sculpt your tree, planning to place light bulbs or LED inserts is essential. Use a tool to strategically carve small holes into the surface, ensuring even spacing and alignment. These openings will later hold small plastic or glass bulbs, allowing your ceramic Christmas tree to glow beautifully when fully assembled.
Drying and Bisque Firing
Letting the Tree Dry Properly
After completing the sculpting process, allowing your ceramic Christmas tree to dry thoroughly before firing is crucial. Air-drying typically takes several days, depending on the thickness of the clay and the ambient humidity. Place the tree in a well-ventilated area, avoiding direct sunlight or excessive heat, as these can cause rapid drying and lead to cracks. Ensure the tree is fully dry to the touch and free from any residual moisture before proceeding to the kiln.
First Firing (Bisque Firing)
The first firing, known as bisque firing, transforms the dried clay into a hardened, durable ceramic piece. Set your kiln to reach a temperature appropriate for ceramic bisque firing, commonly cone 04 (approximately 1,948°F or 1,064°C) for standard clays.
This temperature helps vitrify the clay, making it strong enough for subsequent glazing and decoration. The firing process typically takes 8-12 hours to prevent thermal shock, including the gradual heating and cooling phases. After bisque firing, your ceramic tree will emerge slightly porous, ready for the next steps in its transformation into a glowing holiday centerpiece.
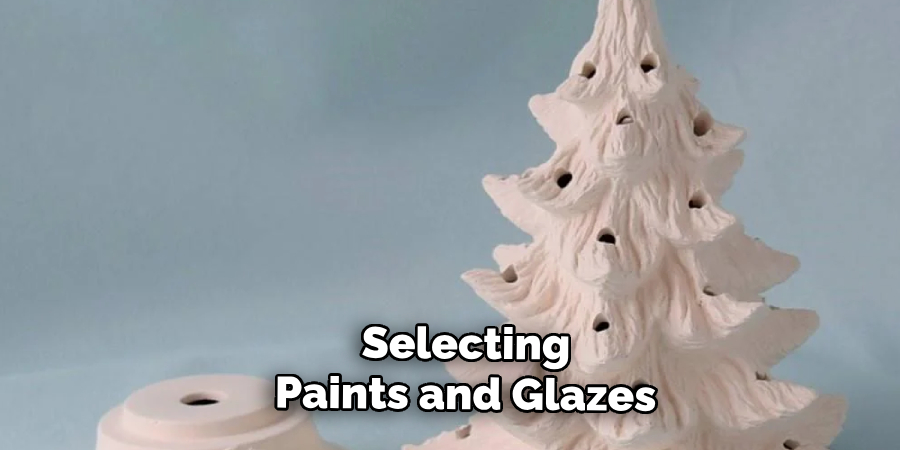
Painting and Glazing the Tree
Once your ceramic tree has been bisque fired, the next stage is where creativity truly shines—painting and glazing the tree. This step allows you to customize your piece with vibrant colors, textures, and finishes, bringing it to life as a festive centerpiece.
Choosing Paints and Glazes
Begin by selecting paints and glazes that match your desired aesthetic. Glossy glazes can provide a shiny, reflective finish, while matte glazes offer a subtle, sophisticated look. For a seasonal touch, specialty glazes like metallics or glitter can add extra holiday magic. Underglazes are ideal for intricate designs, allowing for precise application and vivid colors that remain sharp under a clear topcoat.
Hand-Painting Details
When painting your tree, consider adding thoughtful details to enhance its visual appeal. Shading and highlights can create depth, making the branches appear more lifelike. For a festive touch, you can paint snow effects on the tips of branches or add accents like colorful ornaments or holly berries. Working patiently with small brushes or sponges ensures clean, detailed designs. Underglazes are perfect for this stage, allowing for fine control and easy layering.
Applying a Protective Glaze
After painting, applying a protective glaze is essential to seal your work and achieve the desired finish. A clear gloss glaze is popular as it enhances colors while providing a durable, shiny surface. Carefully brush or dip the tree to ensure an even application, avoiding drips or pooling.
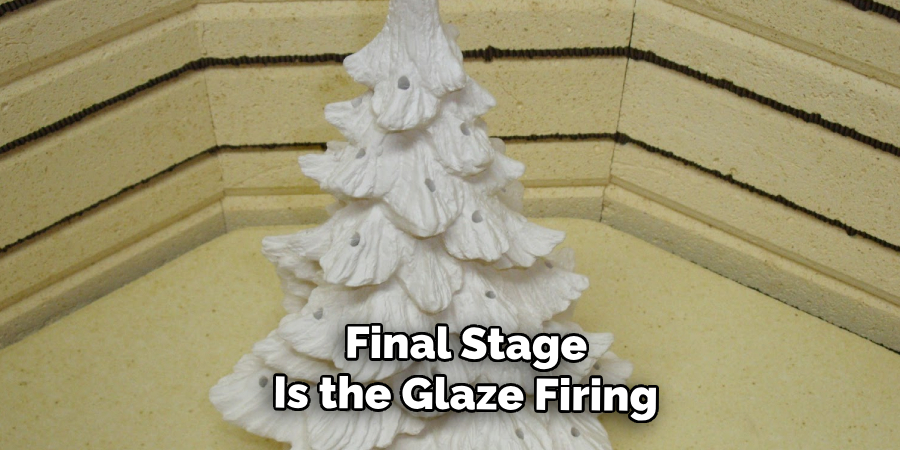
Second Firing (Glaze Firing)
The final stage is the glaze firing, which vitrifies the glaze and locks in your design. The firing temperature depends on the type of glaze used—consult manufacturer guidelines for accuracy. Typically, mid-range glazes fire around cone 6 (approximately 2,232°F or 1,222°C), while low-fire glazes fire around cone 06 (approximately 1,830°F or 999°C). Allow the tree to cool gradually to prevent cracking, resulting in a beautifully finished ceramic tree that sparkles with festive charm.
Adding Lights and Finishing Touches
Installing Mini Bulbs
Carefully install mini bulbs in the pre-drilled holes to bring your ceramic tree to life. Depending on your preference and intended display location, you can choose between electric or battery-powered lights.
Electric lights provide consistent brightness and are ideal for long-term setups, while battery-powered options offer flexibility for spaces without easy access to outlets. Secure the bulbs firmly in place, ensuring they fit snugly in each hole. You can use a small amount of adhesive if necessary, but ensure it doesn’t obstruct the light.
Decorating the Base
Once the lights are in place, focus on decorating the base of your ceramic tree. To create a winter wonderland look, you can add snow effects using textured paint or faux snow. Glitter can be applied sparingly for a touch of sparkle, or you can paint a festive design to match your holiday theme. Personalize the base to reflect your style and creativity.
Sealing and Final Touches
To protect your ceramic tree and its delicate details, apply a clear coat as the final step. This will help preserve your design, prevent wear and tear, and give your tree a polished finish. Once sealed, your ceramic tree is ready to be displayed and admired during the holiday season!
Common Mistakes and Troubleshooting
Cracks During Drying

Cracks can develop during drying due to uneven moisture loss or rapid drying. To avoid this, ensure your ceramic tree dries slowly and evenly by covering it with plastic to regulate moisture. Keep it in a cool, dry area away from direct sunlight or heat sources. If cracks do appear, you can repair them before firing by using clay slip to fill the cracks and smoothing the surface with a damp sponge.
Glaze Issues
Bubbles, drips, or uneven glazing can detract from the final appearance of your tree. Thoroughly mix your glaze and apply it in thin, even layers to prevent bubbles or thick spots. Allow sufficient drying time between coats, and avoid overloading your brush. If bubbles appear during firing, sand them down gently and apply touch-ups if necessary.
Fitting the Lights Properly
Ensuring the lights fit securely is crucial for a polished look. Test the bulb openings before firing to confirm they are the correct size. If adjustments are needed, carefully enlarge the openings with a ceramic file. After firing, secure the lights with small amounts of adhesive if they feel loose, ensuring they stay firmly in place for display.
Tips for Personalization
Color Variations
Regarding color, the possibilities extend far beyond the traditional green. Modern ceramic trees often feature stunning variations such as crisp white, luxurious gold, or sleek silver finishes. You can even experiment with non-traditional colors, like deep blue or pastel tones, to match your personal style or holiday décor theme.
Adding Personal Touches
Adding unique details, such as custom names, dates, or intricate designs, elevates your ceramic tree into a cherished keepsake. Use carving tools to etch meaningful symbols before firing or employ fine brushes to add painted details that reflect your family traditions or special memories.
Creating Matching Pieces
To complement your main piece, consider crafting matching accessories, like mini ceramic trees or ornaments. These coordinated items help create a cohesive holiday display and add charm to your seasonal decorations.

Conclusion
Learning how to make a ceramic Christmas tree can be a rewarding and enjoyable experience. You can create a unique holiday centerpiece by following the key steps—molding the shape, allowing it to dry, carefully glazing it, and adding personal decorations.
Don’t hesitate to experiment with designs, colors, and finishes to make the project truly your own. Whether you choose to gift it or display it in your home, a handcrafted ceramic Christmas tree becomes a cherished tradition that beautifully embodies the festive spirit. Remember, the joy is in the creativity and the memories made along the way!
Professional Focus
Harry Ciotti is a highly skilled kiln operator with a sharp eye for detail and an in-depth understanding of the firing process. His expertise ensures that each ceramic piece reaches its full potential, perfectly balancing strength and beauty. Harry takes pride in overseeing the final stage of pottery creation, transforming raw clay into durable and stunning works of art.
About the Author
Harry Ciotti is a dedicated kiln operator and ceramic artist who brings passion and precision to every piece he fires. With a deep commitment to craftsmanship, Harry ensures that every ceramic creation is fired to perfection, from delicate vases to robust sculptures. He not only operates the kiln, but understands the unique needs of each piece, ensuring it reaches its full artistic potential. Through his work, Harry blends precision with artistry, making every firing a story of transformation.
Education History
University: California College of the Arts
Degree: Master of Fine Arts in Ceramics
Harry’s advanced education in ceramics has refined his technical skills, particularly in kiln operation, firing processes, and ceramic artistry. His educational background equips him to produce top-quality ceramic pieces that reflect both technical excellence and artistic expression.
Expertise:
- Kiln Operation and Firing Techniques
- Ceramics Creation (Functional and Artistic)
- Precision Craftsmanship
- Glazing and Texture Techniques
- Ceramic Artistry and Storytelling