Ceramic pipes are both functional and artistic creations, often used for smoking or as decorative pieces. Crafting a ceramic pipe involves a fascinating blend of skill, creativity, and technique. Whether you’re a seasoned ceramic artist or a beginner looking to explore this craft, making a ceramic pipe can be a rewarding and enjoyable process.
This guide on how to make a ceramic pipe will walk you through the basics of designing, shaping, and finishing a ceramic pipe, helping you create a unique and personalized piece.
Why Make a Ceramic Pipe?
Ceramic pipes have been used for centuries, with evidence of their existence dating back to ancient civilizations. They are not only aesthetically pleasing but also functional and durable. Unlike other materials, such as wood or glass, ceramic pipes do not conduct heat or break easily, making them a popular choice among smokers.
Additionally, creating your own ceramic pipe allows you to express your creativity and personalize the design according to your preferences. It can also be a fun and meditative activity that allows you to disconnect from the outside world and focus on creating something beautiful with your hands.
Materials Needed
To make a ceramic pipe, you will need the following materials:
Clay
Choose a clay that is suitable for creating pipes, as some types of clay may contain harmful chemicals when smoked. White earthenware or stoneware clay are popular choices for making ceramic pipes.
Pottery Tools
These include a pottery wheel, carving tools, and shaping tools such as ribs and sponges.
Glazes
Glazes are used to add color and finish to the ceramic pipe. You can choose from a variety of glazes depending on the final look you want to achieve.
Kiln
A kiln is necessary for firing the ceramic pipe at high temperatures, making it strong and durable.
8 Step-by-step Guidelines on How to Make a Ceramic Pipe
Step 1: Design Your Pipe
Start by visualizing the design of your ceramic pipe. Consider the overall shape, size, and style you want to achieve, as well as any specific features such as carvings, patterns, or textures. Sketch your design on paper to help you refine your ideas and plan the dimensions of your pipe.
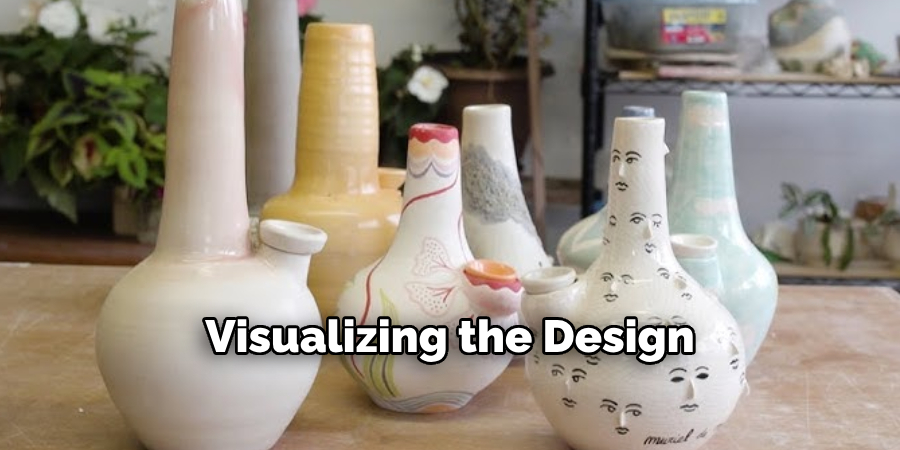
Keep in mind functionality when designing; ensure there is enough space for the bowl, a comfortable grip, and a clear airflow passage. A well-thought-out design will make the shaping process smoother and help you create a balanced, visually appealing piece.
Step 2: Prepare the Clay
Before shaping your pipe, it is essential to prepare the clay properly. Start by kneading the clay thoroughly to eliminate any air bubbles, a process known as wedging. This step ensures the clay has a uniform consistency, which is vital to prevent cracking or unevenness during shaping or firing.
Once the clay is well-kneaded, cut it into a manageable piece based on the size of your pipe design. Keep the clay moist and pliable by covering any unused portions with a damp cloth or plastic wrap to prevent it from drying out. Properly preparing the clay sets the foundation for a successful and durable ceramic pipe.
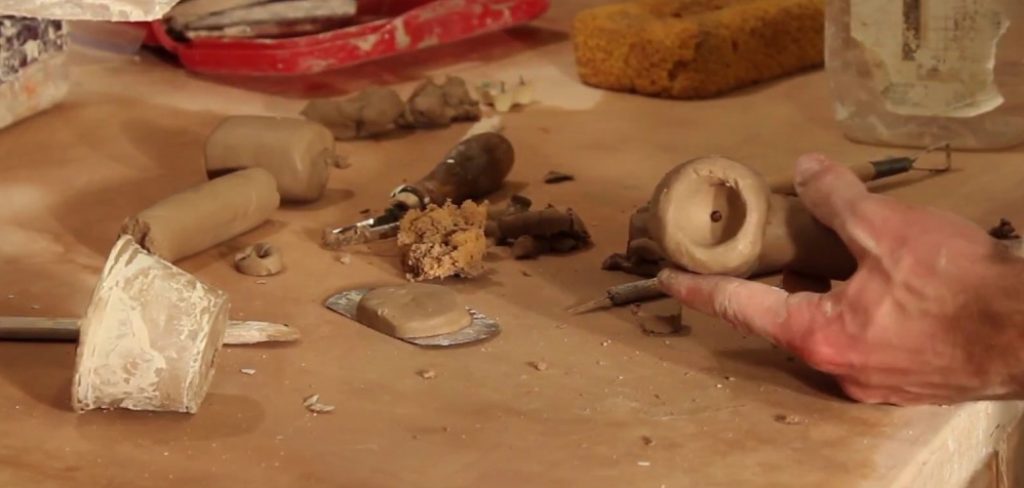
Step 3: Shape the Pipe
Using a pottery wheel or hand-building techniques, start shaping your pipe according to your design. Remember to keep the thickness of the clay consistent throughout for an even and balanced pipe. Use tools like ribs and sponges to smooth out any imperfections and create a comfortable grip.

As you shape your pipe, continually refer to your design sketches and make necessary adjustments. Don’t be afraid to experiment and let your creativity flow.
Step 4: Add Details
If desired, add any decorations or details to your pipe using carving tools or stamps. These can range from simple lines or shapes to more intricate designs. Be mindful of not making the pipe too fragile by adding too many details; the pipe should still be durable and functional.
If you’re planning to add color, now is the time to do so by applying glazes using a brush or dipping method. Keep in mind that the glaze will change color after firing, so test it on a small portion of your pipe first before fully glazing it.
Step 5: Allow the Pipe to Dry
Once the shaping and details are complete, allow your ceramic pipe to dry thoroughly. This can take several days or even up to a week depending on the thickness of your pipe and humidity levels. Make sure to turn the pipe over every day to ensure even drying.
Avoid rushing this step as any remaining moisture can cause issues during firing, such as cracking or exploding in extreme cases.
Step 6: Bisque Firing
Once your pipe is completely dry, it’s ready for the first firing, known as bisque firing. This step removes any remaining water and organic matter from the clay and prepares it for glazing. Place your pipe in a kiln at low temperatures (around 1800°F) and let it fire for several hours until it turns a light color.
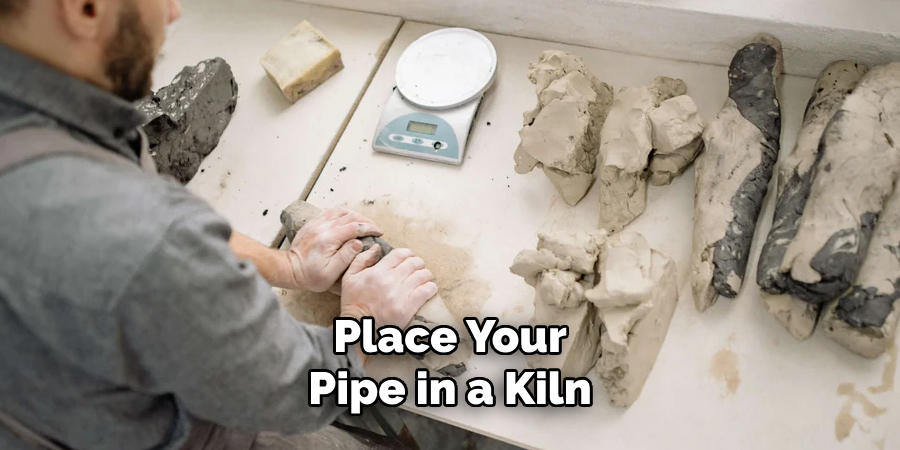
It is crucial to follow the kiln’s instructions and monitor the temperature carefully during this process. Once done, let the pipe cool down before handling it.
Step 7: Glaze Firing
Next, apply your chosen glazes to your bisque-fired pipe. You can use multiple layers or colors to achieve a unique look. After applying the glaze, fire your pipe in the kiln again at higher temperatures (around 2200°F) until the glaze melts and fuses with the clay surface. This process will take several hours, followed by cooling time.
But don’t stop here; you can also experiment with different glaze techniques, such as dripping or layering, to create a one-of-a-kind piece.
Step 8: Finishing Touches
Once your pipe is cool, it’s time for the final touches. Use sandpaper or a file if there are any rough edges that need smoothing out. You can also add a coat of wax or polish for extra shine and protection.
Then sit back, admire your creation, and enjoy smoking from your personal, handcrafted ceramic pipe. With proper care and maintenance, your ceramic pipe can last for many years to come. Keep experimenting with new designs and techniques to continue creating unique pieces that reflect your style and creativity.

Following these step-by-step guidelines on how to make a ceramic pipe will help you make a beautiful and functional ceramic pipe that is truly one-of-a-kind. So go ahead and let your imagination and hands work together to create a masterpiece. Happy crafting!
Additional Tips
- Before starting, it’s also important to gather all necessary safety equipment, such as gloves and goggles, to protect yourself from any potential hazards when working with clays and glazes.
- Don’t be discouraged if your first attempt doesn’t turn out as expected. Making ceramic pipes takes practice, patience, and trial and error to perfect the craft.
- If you don’t have access to a kiln, there are alternative methods of firing clay at home, such as using a microwave or bonfire. However, these options may not produce the same quality results as a professional kiln.
- Consider joining local pottery classes or workshops to learn from experienced potters and expand your skills in making ceramic pipes.
With time and dedication, you can create beautiful, functional pieces that reflect your unique style and personality. So let your creativity flow and have fun creating your own ceramic pipes!
Safety Considerations
- Always follow proper safety precautions when working with clay, glazes, and firing equipment.
- Use appropriate ventilation when using glazes and during firing.
- Be mindful of any sharp edges when handling or finishing your ceramic pipe.
- Consult a professional if you are unsure about any specific materials or techniques used in making ceramic pipes. Keep children and pets out of reach to prevent accidents. Always use caution when smoking from a ceramic pipe, as it may get hot during use.
Customization and Decoration Ideas
- Use different types of clay to create unique textures or colors, such as adding colored slips or using porcelain clay for a smooth, white finish.
- Incorporate natural materials like leaves or flowers into your design by pressing them into the clay before firing. These will burn away during firing, leaving behind an intricate imprint on the pipe surface.
- Experiment with different shapes and sizes to create a variety of pipes, such as traditional tobacco pipes or modernized designs for smoking other substances.
- Add personalized symbols or initials to your pipe using carving tools for a more customized touch.
- Use unconventional methods for shaping your pipe, such as hand-building techniques without a pottery wheel, to create more organic and free-form designs.
- Incorporate non-toxic, food-safe glazes to create functional pipes for smoking herbal blends or medicinal herbs.
Frequently Asked Questions
Q: How Long Does It Take to Make a Ceramic Pipe?
A: The time can vary depending on factors such as the complexity of the design, drying and firing times, and availability of materials. It typically takes around one to two weeks to complete a ceramic pipe.
Q: Can I Make a Ceramic Pipe Without a Pottery Wheel?
A: Yes, you can make a hand-built ceramic pipe using techniques such as coiling or slab building. However, using a pottery wheel may help create a more symmetrical and evenly shaped pipe.
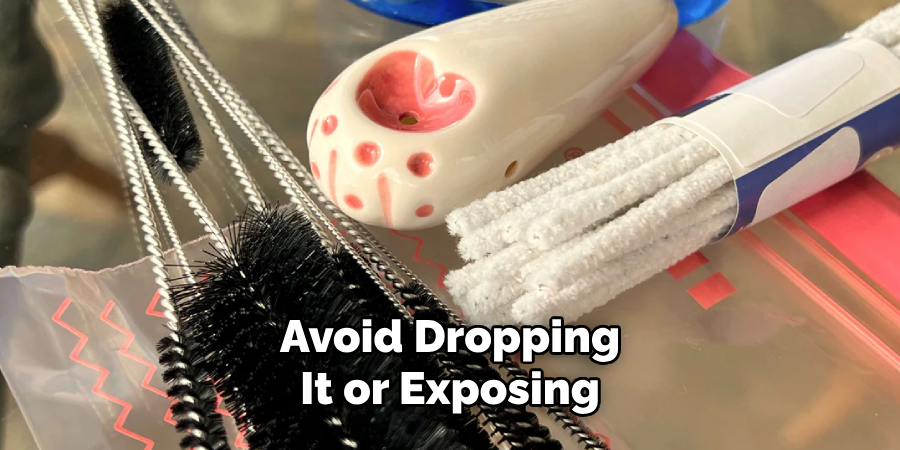
Q: How Do I Care for My Ceramic Pipe?
A: To ensure the longevity of your ceramic pipe, avoid dropping it or exposing it to extreme temperatures. After use, clean the pipe with warm water and let it dry completely before storing it in a safe place. Avoid using harsh chemicals or abrasive materials when cleaning. Remember to handle your ceramic pipe with care and enjoy smoking from your one-of-a-kind creation!
Conclusion
Creating a ceramic pipe is a rewarding process that combines artistry, craftsmanship, and functionality. By following the steps on how to make a ceramic pipe outlined above, you can transform a simple piece of clay into a unique and durable handmade pipe. This craft not only allows you to express your creativity but also produces a functional object that you can enjoy or gift to others.
With practice and experimentation, you’ll refine your skills and develop your style, resulting in even more intricate and personalized designs in the future. Remember to prioritize safety and patience throughout the process for the best results. Ceramic pipes DIY projects offer a creative way to craft functional and artistic pieces, perfect for adding a handmade touch to your home or garden. Happy crafting!
Professional Focus
Harry Ciotti is a highly skilled kiln operator with a sharp eye for detail and an in-depth understanding of the firing process. His expertise ensures that each ceramic piece reaches its full potential, perfectly balancing strength and beauty. Harry takes pride in overseeing the final stage of pottery creation, transforming raw clay into durable and stunning works of art.
About the Author
Harry Ciotti is a dedicated kiln operator and ceramic artist who brings passion and precision to every piece he fires. With a deep commitment to craftsmanship, Harry ensures that every ceramic creation is fired to perfection, from delicate vases to robust sculptures. He not only operates the kiln, but understands the unique needs of each piece, ensuring it reaches its full artistic potential. Through his work, Harry blends precision with artistry, making every firing a story of transformation.
Education History
University: California College of the Arts
Degree: Master of Fine Arts in Ceramics
Harry’s advanced education in ceramics has refined his technical skills, particularly in kiln operation, firing processes, and ceramic artistry. His educational background equips him to produce top-quality ceramic pieces that reflect both technical excellence and artistic expression.
Expertise:
- Kiln Operation and Firing Techniques
- Ceramics Creation (Functional and Artistic)
- Precision Craftsmanship
- Glazing and Texture Techniques
- Ceramic Artistry and Storytelling