

Acrylic paint, known for its fast-drying properties and versatility, has become a popular medium in both art and DIY projects. Its ability to adhere to various surfaces makes it a favorite among artists and creators. However, the quick-drying nature of acrylic paint can pose a challenge, as it tends to harden rapidly on brushes if not cleaned immediately. This can lead to paint build-up, rendering brushes less effective over time.
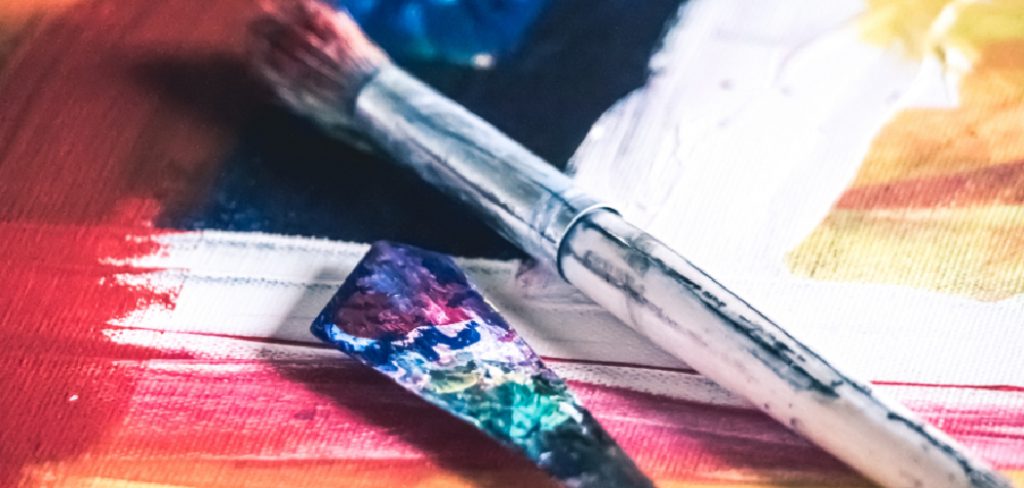
Understanding how to get acrylic paint out of brushes is crucial for maintaining their longevity and performance. This article aims to provide a comprehensive guide to effectively cleaning acrylic paint from brushes, ensuring that they remain in excellent condition for future use. Whether you’re a professional artist or a hobbyist, following these cleaning techniques will help extend the life of your brushes and enhance your painting experience.
Materials Needed
Cleaning brushes with dried acrylic paint requires careful use of the right materials to maintain the quality of the bristles. Mild soap, such as dish soap or a specialized brush cleaner, is ideal because it effectively removes paint without causing damage. These soaps are gentle on the bristles, ensuring they remain soft and pliable. Water, whether warm or cold, is crucial in loosening paint before it fully hardens, aiding in the initial cleaning process.
Paper towels or cloth are essential for wiping excess paint during cleaning, preventing it from accumulating on the bristles. Optional tools, like a comb or a specialized brush cleaner tool, can be instrumental in removing paint trapped deep within the bristles, ensuring a thorough clean. Additionally, vinegar or rubbing alcohol can be used to break down stubborn dried acrylic paint, offering an effective solution for particularly tough spots without harming the bristles.
How to Get Acrylic Paint Out Of Brushes: Cleaning Brushes Immediately After Use
Proper brush care immediately after painting with acrylics is essential to prevent the paint from hardening on the bristles. Follow these steps to maintain the quality and prolong the life of your brushes.
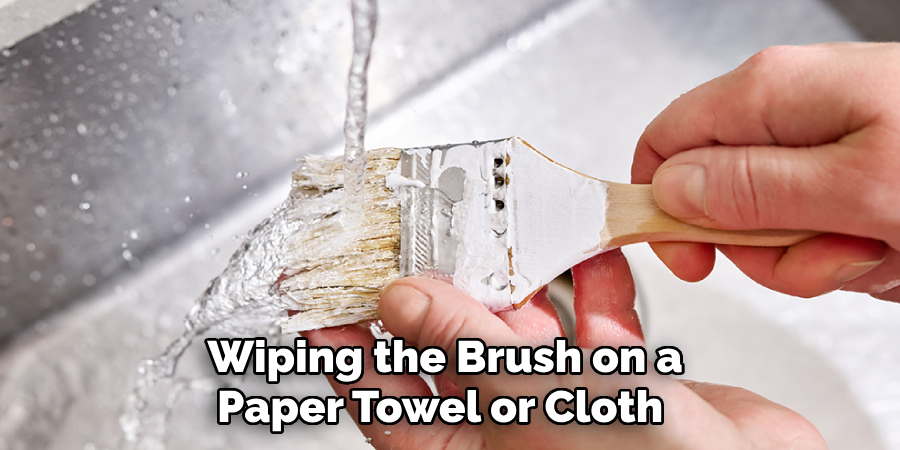
Step 1: Wipe Excess Paint Off
Begin by wiping the brush on a paper towel or cloth. This will remove as much excess paint as possible before rinsing. Be sure to clean the brush as soon as you’ve finished painting to avoid letting the paint dry, making it much harder to remove later.
Step 2: Rinse the Brush in Water
Use warm water to rinse the brush thoroughly. Swirl the brush in a water container to help loosen the paint from the bristles. It’s important to rinse immediately after wiping off the excess paint. Avoid soaking the brush in water for extended periods, as this can cause the handle to swell and the ferrule—the metal part that holds the bristles—to loosen, potentially damaging the brush.
Step 3: Lather with Soap
Apply a mild soap or a specialized brush cleaner directly to the bristles. Gently massage the soap into the brush, working it into a lather. This will help break down any remaining acrylic paint. Rinse the brush under running water, gently squeezing the bristles until the water runs clear, indicating that most of the paint has been removed.
Step 4: Repeat if Necessary
Some brushes, particularly those with thicker bristles, may require multiple repeats of the soap-and-rinse process. Pay special attention to the area near the ferrule, as paint tends to accumulate there. Repeating the process ensures that all traces of paint are removed, keeping your brushes in top condition for future use.
How to Get Acrylic Paint Out Of Brushes: Removing Dried Acrylic Paint from Brushes
Overcoming the challenge of dried acrylic paint on brushes requires patience and the right techniques to restore your brushes to optimal condition. Follow these detailed steps to effectively remove even the most stubborn paint residues.
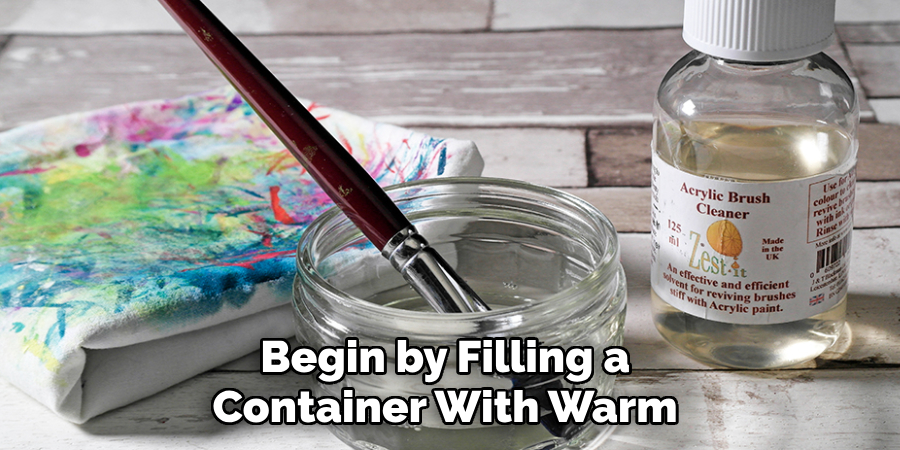
Step 1: Soak the Brush in Warm, Soapy Water
Begin by filling a container with warm, soapy water—ideal for softening dried acrylic paint on the bristles. Use a mild soap to avoid harsh chemicals that may degrade the brush material. It is essential to ensure the water is comfortably warm, not hot, to prevent damaging the brush’s bristles or loosening the glue in the ferrule. Immerse the brush in the solution for about 15 to 30 minutes, allowing the warm water and soap combination to soften the hardened paint.
Step 2: Gently Scrub the Bristles
Once the paint begins to soften, use your fingers or a brush comb to gently scrub the bristles to dislodge the loosened paint. Emphasize a gentle approach to maintain the quality of your bristles, especially those on higher-quality brushes that can become frayed with aggressive scrubbing. Focus particularly on the area close to the ferrule where paint accumulates.
Step 3: Use Vinegar or Rubbing Alcohol for Stubborn Paint
For any residual paint that remains after scrubbing, vinegar or rubbing alcohol can be exceptional alternatives to break down and dissolve dried paint. Soak the brush in a small container filled with either vinegar or rubbing alcohol for 15 to 30 minutes. This process will soften any painfully stubborn acrylic remnants. After soaking, gently scrub the bristles again with your fingers or a brush comb to remove the dissolved paint.
Step 4: Use a Brush Cleaner Tool or Comb
For a thorough clean, employ a specialized brush cleaner tool or a fine-toothed comb, starting from the ferrule and working outward. This method effectively separates the bristles, dislodging any remaining paint trapped deep within. When using these tools, be cautious and maintain alignment to prevent any damage to the bristle layout.
Step 5: Repeat and Rinse Thoroughly
Should any paint persist after these methods, repeat the soaking and scrubbing process until your brush is entirely free of paint. Always finish the process with a thorough rinse in clean water to remove all residues of soap, vinegar, or alcohol. This will ensure your brush is free of any substances that might affect its next use, keeping it in top condition for future artistic or project endeavors. Regular repetition of these steps helps maintain the longevity and performance of your brushes.
Conditioning the Brush After Cleaning
Step 1: Use a Brush Conditioner or Mild Hair Conditioner
Once your brushes are clean, applying a small amount of brush conditioner or a gentle hair conditioner addresses the issue of post-cleaning bristle dryness. This step helps restore the softness and flexibility of the bristles, which can become stiff or brittle after thorough cleaning processes involving soap or other cleaning agents.
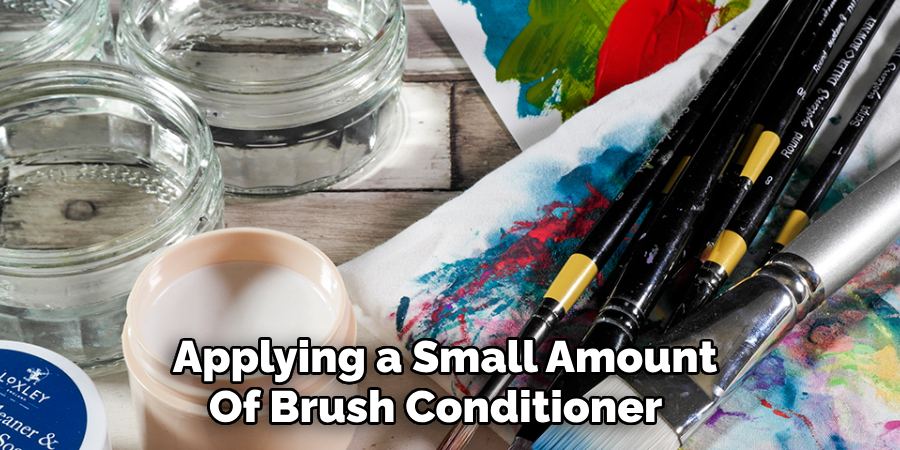
Simply apply a dab of conditioner onto the palm of your hand and gently work it through the bristles. By doing so, you not only preserve the bristles’ quality but also help extend the overall lifespan of your brush, ensuring its usability for future painting sessions.
Step 2: Shape the Bristles
After conditioning, reshaping the bristles back to their original form is crucial. Press the bristles between your fingers, coaxing them into their natural shape. This step is important as it ensures the brush maintains precision during your next use, enhancing both performance and ease of use. Carefully aligning the bristles helps maintain their proper configuration, avoiding any permanent misalignment.
Step 3: Let the Brush Dry Properly
Proper drying is essential to prevent damage to brushes. It is advisable to let the brush dry horizontally or with the bristles facing downward. This position stops water from seeping into the ferrule, which can loosen the glue holding the bristles in place, potentially impacting the brush’s integrity. Adopting this drying method ensures that your brush maintains its structure and remains in excellent condition for future projects.
Storing Brushes to Prevent Paint Build-up
Step 1: Store Brushes Vertically, Bristles Up
To maintain the quality and shape of your brushes, it is recommended that they be stored vertically with the bristles facing upward. This position prevents the bristles from bending or distorting over time, ensuring they remain in pristine condition.
Storing brushes vertically also allows for even air drying, which is crucial for preventing moisture from collecting at the base of the bristles. This reduces the risk of weakening the ferrule glue, preserving the brush’s structural integrity and prolonging its lifespan.
Step 2: Regular Cleaning Routine
A regular cleaning routine after each use is vital to maintaining brush health. Immediate cleaning prevents acrylic paint from drying and hardening on the bristles, which can cause damage and necessitate more vigorous scrubbing later. By consistently cleaning your brushes, you ensure that they stay in optimal condition, ready for your next creative session, and ultimately extend their usable life.
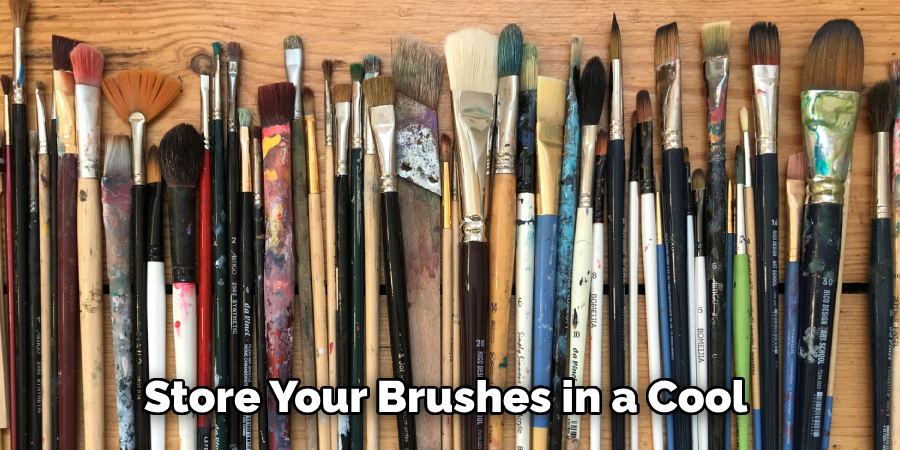
Step 3: Keep Brushes Away from Direct Sunlight or Heat
It is important to store your brushes in a cool, dry place shielded from direct sunlight or excessive heat. These environmental factors can cause bristles to become brittle or distorted and may also affect the adhesive in the ferrule, compromising the strength and durability of your brushes. Keeping your brushes in a stable environment ensures they remain robust and ready for future use.
Troubleshooting Common Issues
Issue 1: Paint Stains Won’t Come Out
Certain pigments, particularly those with strong staining properties, can leave a mark on bristles despite regular cleaning. While aesthetically concerning, these stains generally do not impact the brush’s performance. To minimize staining, ensure thorough cleaning after each use, focusing on rinsing the bristles well with water to remove pigment before it sets. Using a high-quality, pigment-specific cleaner may also help reduce the potential for staining.
Issue 2: Bristles Becoming Hard After Cleaning
Hard bristles often result from soap residues not being completely rinsed away. To remedy this, soak the brush in clean, warm water to help dissolve any remaining soap. After soaking, rinse the bristles thoroughly and apply a small amount of conditioner to restore softness and flexibility. This additional step ensures your brushes remain functional and comfortable for all your painting needs.
Issue 3: Loose Bristles or Damaged Ferrule
Improper drying or soaking methods can weaken the ferrule, leading to loose bristles. To prevent this, avoid immersing the brush handle or ferrule during cleaning and ensure brushes dry bristles down or horizontally. Handling brushes with care, particularly when washing or storing, will help maintain their structural integrity, keeping them reliable and effective for longer periods.
Final Tips for Extending Brush Life
Tip 1: Avoid Letting Paint Dry on the Brush
Emphasize the importance of cleaning immediately after use to prevent acrylic paint from drying and hardening on the bristles. Prompt action maintains bristle flexibility and ensures optimal brush performance in subsequent sessions.
Tip 2: Use a Brush Cleaner for Deeper Cleans
Occasionally using a specialized brush cleaner is recommended for deep cleaning to effectively remove any paint buildup that regular cleaning might miss. This ensures that your brushes stay in excellent condition and extend their operational lifespan.
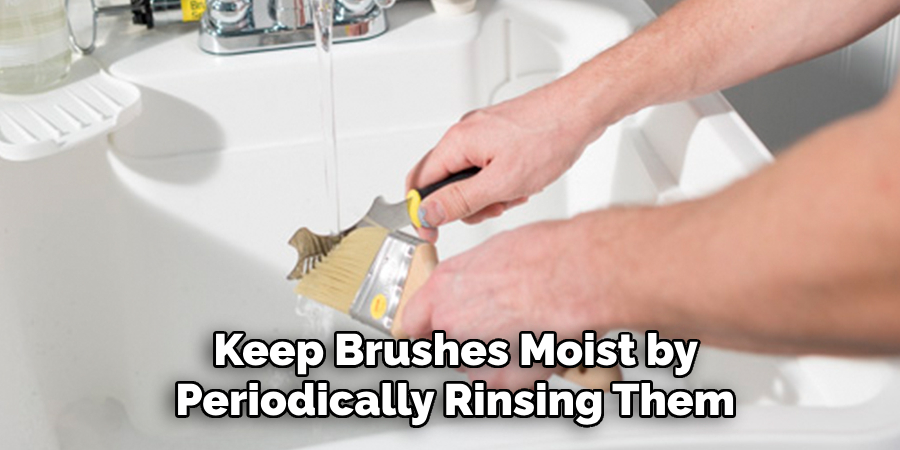
Tip 3: Keep Your Brushes Moist When Painting
Keep brushes moist by periodically rinsing them in water during long painting sessions to prevent paint from drying on the bristles. Regular rinsing helps maintain brush suppleness and enhances painting accuracy throughout the creative process.
Conclusion
In conclusion, knowing how to get acrylic paint out of brushes is essential for preserving both performance and longevity. Begin with immediate cleaning to prevent paint from hardening, soak brushes if the paint has dried, and utilize the appropriate tools and techniques for optimal results.
Proper brush care maintains quality and extends the lifespan of your valuable tools. Whether you are an artist or a DIY enthusiast, adopting a regular cleaning routine ensures your brushes remain in top condition, ready to support your creative endeavors time and again. Remember, careful maintenance is key to longevity.
Professional Focus
Toby Rede, a professional potter, combines artistic expression with functionality in his ceramic creations. His work blends natural textures, modern forms, and sustainable materials, making him a standout voice in the pottery world focused on intentional craftsmanship.
About the Author
Toby Rede, a dedicated potter and blogger, shares his insights on functional and artistic ceramics, drawing inspiration from sustainable gardening and nature. Based in his studio, he blends craftsmanship with everyday life, encouraging others to incorporate handmade pottery into their homes for both beauty and utility.
Education History
University: Alfred University
Degree: Associate Degree in Ceramic Technology
Toby’s education laid the foundation for his technical expertise, equipping him with the skills necessary to create pottery that merges functionality and aesthetic appeal.
Expertise:
- Pottery Creation
- Ceramic Techniques (Texture, Glazing, Sustainable Materials)
- Functional Art and Design
- Craftsmanship Philosophy
- Blogging on Handmade Pottery and Everyday Life